How to Fix Windows Installer Error 1601

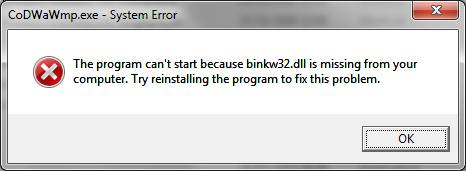
When installing applications via the Microsoft Windows Operating System, you may have encountered an error called “Windows Error Message 1601.” According to Microsoft, this error occurs for one of two reasons. The first reason being that you are trying to install an application while in safe mode; the second possibility is that the Windows Installer is not properly installed. In either case, the fix for the 1601 error is possible using two different methods.


Windows installer problem is a very common problem encountered by computer uers. And there are different kinds of windows installer problems. Among them 1601 is a very common one. If the problem is caused by windows installer, then it is easy to resolve. Please follow below steps:


  • 1. Click on the Windows Start button. In the Windows Start Search box, type the following code: %windir%\system32\msiexec /unregserver, and then press the “Enter” key.


  • 2. Next, go back to the Windows Start button and then to the Windows Start Search box and type: %windir%\system32\msiexec /regserver followed by the “Enter” key again.


  • 3. Enter your admin password if your system asks for the password (This may not occur). Finally, click on the “Allow” option to finish the process. Attempt to install your application to test if the process worked.


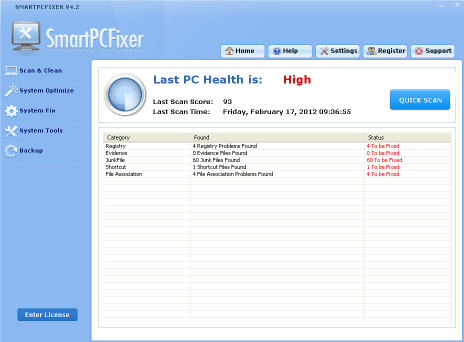
If the problem is not caused by Windows Installer, you need to correct the problem with a registry cleaner. SmartPCFixer is a registry cleaning software dedicated to fixing computer problems for users. Most users reviewed Smart PC Fixer as a good registry cleaning software.


SmartPCFixer displays following special features:


  • a. SmartPCFixer has an easy to use interface and no computer knowledge is required.
  • b. SmartPCFixer has powerful error fixing function compared with other software.
  • c. With SmartPCFixer, almost all computer errors can be corrected in a few steps.


How to Get Rid of Script Error 2072


Do you encounter a script error number called 2072? If you do, this articel will help you a lot.


Let’s know more about 2072 script error:

Script 2072 error is an error message you get when you try to print a document online with your printer. When this error occurs, you cannot print anything. This is really a big trouble. Sometimes the problem has something to do with the IE version. For example, if you upgrade your IE from version8 to version9, the 2072 script error will occur and tell you that “An error has occurred in the script on this page“. Or “The system cannot find the file specified.


To fix 2072 error, you need a registry cleaning tool–SmartPCFixer. SmartPCFixer is good at fixing script errors. No matter the error is given by a program or IE, SmartPCFixer will alsways find the reason and fix the problem. Please follow below steps to repair 2072 script error:


  • Download SmartPCFixer.
  • Run a scanning after installation.
  • Repair the found script errors.


If you want to fix the problem manually, please follow these steps:


  • 1. Clicked Tools > Internet Options > Advanced. And click to select the Disable script debugging (Internet Explorer) and Disable script debugging (Other) check boxes, and then click to clear the Display a notification about every scripterror check box.  This did not help at all.
  • 2. Uninstall and reinstall printer drive and reinstall it  from Microsoft Windows Update with the latest drivers and tested printing from Microsoft Word 2003 and printed document.
  • 3. Try  printing a webpage running Internet Explorer as an Administrator.
  • 4. Uninstall your higher IE version and return back to the lower one.
  • 5. Download the lastest printer driver for your printer.


When you try all above solutions, the 2072 script error will disappear forever. SmartPCFixer will also do a good job for you in other ways, such as fixing other IE errors, oultook errors, java errors, etc. SmartPCFixer is your best choice isn’t it?


How to Repair Binkw32.dll


A DLL error  usually occurs when a DLL file is missing or corrupted due to some reason. A DLL file, or Dynamic Link Library file, is a type of program that works with many windows programs, such as Windows drivers or Windows software programs. This file is very important, because it contains an executable sub-routine that allows multiple Windows programs and components to perform common tasks. If a dll is lost or corrupted, the first thing you need to do is to find which one is causing the problem.


Binkw32.dll errors are highly annoying and common encountered by many computer users. These are associated with the “Bink Video” line of software applications. This technology is used mainly in games which use the Bink video technology to render their graphics. If you’re seeing errors for Binkw32.dll, it could be down to several causes which are actually very simple to fix.


To fix Binkw32.dll error, the most easy way it to use a Registry Cleaner. You can follow below steps:


  • 1. Download the Registry Cleaner. Conduct a cleaning with Registry Cleaner. It will delete the corrupted dll file firstly.
  • 2.Then Registry Cleaner will download a new dll file to your PC, and store it in system drive.
  • 3. After downloading, Registry Cleaner will register the new downloaded dll file.


Your problem is fixed, right?

How to Remove AcroIEHelper.dll

DLL problems are encountered by many computer users. And, sometimes it is very difficult to find the reason that causes the problem. There are many kinds of DLLs that you may never hear about the name. This article will introduce a DLL named Acroiehelper.dll that has confused caused trouble to so many people.


AcroIEHelper.dll is an important file needed by Adobe Acrobat to run normally on internet explorer. Adobe Acrobat uses the “AcroIEHelper.dll” file to run plug in code when you open a PDF file in your browser. When the browser opens a PDF, the DLL file loads and you cannot delete it until you stop the service and close the Web browser. If you delete “AcroIEHelper.dll,” you can no longer use the Adobe Acrobat plug in. But if you experience errors with the software, you can delete the file and stop the Adobe service from running.


To get rid of this AcroIEHelper.dll error, following steps will help:

  • 1. Find the Services program:

Close any Web browser you have open on your PC. Click the “Start” button at the bottom left of your desktop and type “services” in the search text box. And then Press “Enter”button. You will see a Services icon on the list.

  • 2. Find Adobe Acrobat and stop it:

Click the “Services” icon in the left panel. A list of services running on the computer is displayed. Click the “Adobe Acrobat” service and click “Stop.” Stopping the service releases the lock placed by the operating system, so you can delete it from your system.

  • 3. Delete the AcroIEHelper.dll:

Click the Windows “Start” button again and type “AcroIEHelper.dll” in the search text box. Press “Enter” to display the location of the file. Right-click the file in the search results and selects “Delete.” Click “Yes” to confirm you want to delete the file.

  • 4. Reregister AcroIEHelper.dll:

Reregister the DLL file with Smartpcfixer, a DLL registering tool. It will help you register the dll automatically. Just download it here: www.smartpcfixer.com

 
After you delete and register the AcroIEHelper.dll file, you will not experience the problem anymore.

Get Rid of Runtime Error 7—“Out of Memory”


There are many kinds of runtime error codes encountered by computer users. Among them, runtime error 7 is a common one. When you got the error on your PC, you also get a message called “Out of Memory”. If you think that the problem is caused by loss of memory or not enough memory, you are wrong. Actually the problem occurs due to a DLL file named FM20.dll. Many windows applications need this DLL file to perform normal functions, but sometimes it doesn’t work. So, your PC cannot run smoothly when there is a problem with this file. The complete error message is like this: Runtime Error “7″: Out of Memory


Steps to get rid of this runtime error:


Step 1: Remove FM20.dll from your computer. As it has caused the problem, we need to delete it first in case of causing further problem. This is vitally important as it means that if you’re looking to get the most out of your PC, you need to ensure that everything is working as smoothly as possible. After you’ve done that, you should then remove the comctl32.ocx file from your PC, as this may also be causing some problems that could lead to the runtime 7 error. This file is used to control various aspects of your software, and is used by many programs on Windows. Unregistering & then replacing the file will refresh it and allow it to run properly again.


Step 2: After remove the FM20.dll, you need to clean the registry left by the problem. This is a very important procedure. If the registries are not well cleaned, other problems may be caused in the future. To clean the registries, you need a registry cleaning tool. And then follow below steps:


  • 1. Download Registry Cleaning Tool and install it on your computer.
  • 2. Do a scanning to discover the registries.
  • 3. After scanning, there is a list of registry discovered.
  • 4. Delete the registries.


Step 3: Run a SFC scanning to check and fix the problem.

  • 1. Go to Start / All Programs / Accessories.
  • 2. Right click the Command Prompt item and select the ‘Run As Administrator’ option.
  • 3. Click Continue on the UAC prompt.
  • 4. In the command prompt window, type the following command: SFC /SCANNOW
  • 5. Press ENTER.

How to Run Windows Update in Windows 7

Have you ever used windows update tools or security tools to make your computer up to date? If your computer is running windows, you need to do some updates for it frequently to make it run smoothly. Microsoft also releases updates and security fixes for windows users periodically.


By loading windows updates, your PC will get following benefits:


  • 1. Keep your Windows computer safe from viruses, spyware and malware.
  • 2. With Windows Update, you have the ability to download updates and choose when to install.
  • 3. You can automatically have updates applied, check for updates only or never check for updates.


Now let’s see how to conduct the updates process. Following steps are very easy to operate:


  • 1. Click Start button at the bottom left of your computer desktop. In the search box, type “Windows Updates” without quotation. Then press Enter. You will see a windows update option on the list. Click on it.
  • 2. In the coming up window, click “Check for updates;” it is located on the left hand-side of the open window. Windows 7 will begin checking for updates. They are categorized as important and optional.
  • 3. Click the “Important Update” link and choose all that apply. Once you are finished choosing your important updates, click “OK.”
  • 4. Click the “Optional Update” link and choose all that apply. Once you are finished choosing your important updates, click “OK.”
  • 5. Click “Install updates”. Windows 7 downloads your updates and installs them. A reboot of your computer is required once the update process is complete.


You also can update windows by a windows auto update tool. It will scan for the updates and conduct the updates automatically.

  • 1. Download and install a windows auto update tool on your computer.
  • 2. Start the tool and click Start Scan option.
  • 3. It will begin the scanning process.
  • 4. A few minutes later, it will finish scanning. You can choose the updates you want to install.

How to Fix HP Printer Errors

HP printers are used by many people. And most of them may have encountered a problem when they try to print. Sometimes the error is clearly shown on monitor, but sometimes the error is just a mystery which make us enable to find the reason and don’t know how to fix it. No matter you know the reason or not, following instructions will always help:


If the problem is caused by hardware, please try below steps:


  • 1. Check the HP printer cables to make sure that they are properly connected. You can try to turn off the printer, unplug it and disconnect all the printer cables. Then plug the printer one more time and reconnect all the cables. Turn on the printer again, and see if this helps fix the problem.
  • 2. Check the HP printer cartridges and print heads to ensure that they’re installed properly. Also see if the printer cartridges are empty. If the ink cartridges have sufficient ink, reinstall the cartridges and the print heads. If ink cartridge is empty, replace it with a new one.


If the problem is due to software, below instructions will work:

  • 1. Make sure that the HP printer’s software is properly installed. If the device does not respond when you try to print or the printer software won’t initialize, uninstall and reinstall the HP printer software.
  • 2. See if your computer’s firewall is preventing the HP printer from functioning properly. Open your firewall preferences and add the printer software executable file (*.exe) as an exception or disable the firewall temporarily to see if this fixes the error.
  • 3. It may also be caused by registry problems on your PC. Please scan your computer with a registry cleaner. It will help you fix the problem. I recommend you Smartpcfixer. It is adept at cleaning junk files on computers and will speed up the responding of your PC. Run Smartpcfixer and do a scanning of your PC. It will scan for a few seconds and fix the problem automatically.

How to Get Rid of Blue Screen Error

Don’t worry about your computer if it suffers a black screen problem. Following short article will give you a complete solution on how to fix black screen error. Just read carefully and the problem will be resolved very quickly.


Black screen is a problem frequently encountered by many computer users. Normally, when you see a freezing computer, there is chance that you are going to meet black screen as well. Before you learn how to fix this error, you will need to know what can probably cause such problem.


The first reason: Virus or malware attacks:

 Troubleshooting: Scan your computer with Anti-virus software.

Virus and malware are quite possible to cause black screen. They can hijack system files and some important processes, causing the system to mess up, freeze, not respond or even crash. To avoid further and more serious damage, it is urgent to run a virus scan to clear out all virus and malware from the computer.

The second reason: Registry error or dll problem.

Troubleshooting: Run registry cleaner to check and fix the problem.

Registry is a vital part to control how a computer runs. If certain registry is missing, programs, or even the system will not run consistantly, or just crash. It is always recommended to run registry cleaner regularly to keep your computer healthy and stable.

The third reason: Graphic card driver corrupted.

Troubleshooting: Update your graphic driver.

This can be done manually. To manually update your driver, you need to check your graphic card name in device manager and then go to the manufacturer’s official website to look for the driver. Normally computer manufacturer will offer such driver as well.

With above three instructions, I think you have already successfully troubleshot the problem. Especially the registry cleaner will always work. It can also fix other problems of computer, such as blue screen, DLL errors, windows update problems, etc. Whenever you get any computer problem, you can come to it for help.

How to Remove Win32 Error

When your computer gets a Win32 error, the application that the error occurred in ceases to work and you are unable to use some functions on your computer. A Win32 error is also called generic “host process error”. Maybe just a small number of people will come across this error, because it is a standard computer error that occurs mainly on computers using Windows versions 95, 98 and 2000 and often during Internet usage. The complete error message is called “Win32 Services has encountered a problem and needs to close.”


This error can be caused by following reasons:

  • a. Certain system files are damaged.
  • b. Improperly installed service packs.
  • c. Viruses or spyware.

To get rid of the problem is not difficult if you know above reasons. Instructions to solve the Win32 Error:


 First, use Smartpcfixer– the most efficient software to solve the Win32 Error.

  • Download and install Smartpcfixer.
  • Run the Smartpcfixer on your system.
  • It can find and delete any remaining files that have been left behind in the system’s registry by the antivirus software.


Two: Close the Ports


  • 1. Open the computer’s registry editor by going to the “Start” menu and clicking on the “Run” option. When the “Run” box opens, type in “regedit”. And then press “Enter” to open the Registry Editor on the screen.
  • 2. Click the folder “HKEY_LOCAL_MACHINE” to show its contents. Next, go to “SYSTEM” > “CurrentControlSet” > “NETBT” and click “Parameters.” Double-click the “TransportBindName” component to open it, then delete any information in the “Value data” box and click “OK.”
  • 3. Go to the “SOFTWARE” folder under the “HKEY_LOCAL_MACHINE” key, then to “Microsoft” and click “Ole.” Double click “EnableDCOM,” change the “Value Data” from “Y” to “N” and click “OK.”
  • 4. Restart the computer and the changes you have made in the registry should take effect. With the ports closed, the Win32 errors should stop.


Three:  Eliminate Viruses

Run your antivirus software’s virus scan on your system. The scanning process finds and eliminates files that are affiliated with viruses that are on your system. If you do not have antivirus software installed on your system, you can download one or buy one for your computer.

How to Fix Microsoft Defender Error 0x800106ba

Error 0x800106ba is a very common windows update error code given by Microsoft Defender. The complete error message you got is:

“Error Code 0x800106ba Application failed to initialize”

“Error Code 0x800106ba the systems license has expired. Your logon request is denied.”

When you see this error on your computer, you can come to following article for help:


Error 0x800106ba may occur when Windows Defender fails to be updated. The system contains some problems that prevent the Windows Defender from updating.  When such error occurs, try to follow below instructions to fix it:


Method 1: Re-register some dlls needed by Windows Defender.

Click Start, click Run, type regsvr32 file name, and then click OK.

Note: In this step, file name is a placeholder for the following files.

To register dlls requires some professional skills. If you are not familiar with how to use regsvr32.exe, it is recommended that you use a registry fixer to register the dlls for you. It will also clean the registry errors in your computer and fix issues that cause the Windows Defender errors. It is always highly suggested that you have a registry cleaner in computer to keep your system healthy and safe.


Method 2: Uninstall and reinstall Windows Defender.

  • 1. Click Start, click Run, type appwiz.cpl, and then click OK.
  • 2. Click Windows Defender, and then click Remove.
  • 3. Follow the prompts to uninstall Windows Defender.
  • 4. Then redownload Windows Defender from official website.


Method 3:  Disable your anti-virus software when updating.

Sometimes anti-virus software will prevent your system from updating. In this situation, please disable your anti-virus software currently. When the update is finished, you can enable the function one more time. Not all anti-virus software will prevent such operation, but some of them may do so. Just do as I recommended.