How to Fix Windows Error Message 80070005


Come across 80070005 error code? Don’t know how to fix the problem? The error code 80070005 is related to administrative permissions in Microsft Windows. The problem can be caused by a few reasons.


There are several reasons a user may experience this code:

  • 1. This error code may be displayed when a user is trying to create a task under an account with a blank password.
  • 2. Another cause may be that a security or anti-virus program on startup is restricting permissions when attempting to install system files such as Service Pack.


To fix the error you will have to change settings in your Windows XP operating system.


Solution one:

  • 1. Access user accounts in Windows XP. Click “Start” and “Control Panel” and double click “User Accounts.” Find the user who is associated with creating the task in the task scheduler.
  • 2.  The account you used to sign into Windows XP before attempting to schedule the task is the user that is associated with that task. Click on that user. Next, click “Create a Password.”
  • 3. Type in a new password. Click “Create Password.” Close all programs and restart Windows.
  • 4. Open Task Scheduler by clicking “Start,” “All Programs,” “Accessories,” “System Tools” and finally “Scheduled Tasks.” Reconfigure the task that caused the error message and, when asked, provide the new user name and password. If the task is created, the problem is resolved.
  • 5. After the installation is complete, open Windows Defender by clicking “Start,” “All Programs,” “Windows Defender.” To see a list of software programs that run on startup, click “Tools,” then “Software Explorer.”
  • 6. Exit all applications and restart your computer. After your computer is restarted, reattempt the task or process that cased the error message. If we dont want to fix it.


Solution two:
Try a registry cleaner tool to fix the 80070005 error. This error code also can be caused by registry problems in Windows operating system. So to clean the system is necessary to fix the problem. Please follow below steps:
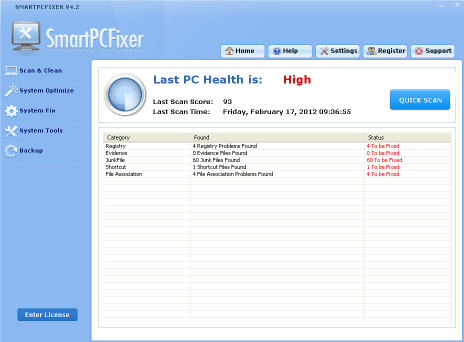
  • 1. Download Smartpcfixer and install it to your computer.
  • 2. Perform a scanning with Smartpcfixer.
  • 3. After scanning, click “Repair All” button to fix the problem.


Windows Error 646 And The Solutions


Windows update error 646 can sometimes occur in user’s computer. Many users may think that windows update error is not important because it just means that an update cannot be installed in the computer. Actually windows update is very important for users to keep computer safe and healthy. Windows updates are to solve bugs and mistakes in Windows system to enhance the system performance and help users better run their computer. If windows update is ignored or just closed, user’s system will become vulnerable and easy to be attacked.


If you have seen windows update error 646 in your computer at the moment, I am glad to tell you that you may be able to fix it if you read this article carefully. You just have to follow several steps, then you are very likely to solve the issue:


Step 1: Disable your protective software


Many antivirus and firewall software will tend to refuse any automatic download from websites without manual permission click. Since windows update is always set to automatic, protective software may see it as dangerous and block it from backstage. What you have to do is just temperarily disable your antivirus and firewall, then try the windows update again. It shall fix the issue.
 

Step 2: Fix corrupted windows file

  • Press “Start” and “R” simultaneously.
  • Type “cmd” (without the quotes) to launch the Command Prompt.
  • Type in the following commands, one at a time:
  • net stop WuAuServ
  • cd %windir%
  • ren SoftwareDistribution SD_OLD
  • net start WuAuServ
  • reboot


Step 3: Fix Windows update error with a windows update fixer

Windows update error can be caused by some complicated windows errors. We will not suggest users manually edit registry in case more serious mistakes are caused. If you have encountered windows update error 646 and cannot fix it with above two steps, you may download a windows update fixer and get it fix the error automatically for you.


Solution to Windows Update Error 0x80072EFD


Windows Update error 0x80072EFD means that there are Windows ‌registry values that are blocking the update from being downloaded and installed. This error usually occurs on Windows XP system and is most likely to be caused by incorrect host file.


To trouble shoot this issue:


Method1: Repair the host file

To remove Windows Update entries from the HOSTS file, follow these steps:

-Click Start, point to All Programs, point to Accessories, and then click Notepad
-On the File menu, click Open.
-In the Files of type box, click All Files.
-In the Look in box, locate the following folder:

C:\Winnt\system32\drivers\etc\

-Double-click to open the hosts file.
-Remove any lines that contain entries for Windows Update (http://v4.windowsupdate.microsoft.com).
-On the File menu, click Save.
-Close Notepad.


Method 2:  Rename the Windows Update Software distribution folder


1. Stop the Windows Update service (make sure you are logged on as an Administrator)

Start button || Control Panel ||System and Maintenance ||Administrative Tools
Double-click Services 
(Provide the Administrator password or confirmation if prompted to do so.)
Right-click the Windows Update service and click Stop.

2. Click Start, type %windir% in the Start Search box, and then press ENTER.

Locate and rename the SoftwareDistribution folder.  You can rename it to softwareDistribution.old.


Method 3: Download a registry cleaner to fix the registry problem.

 Windows update error 0x80072EFD is easy to solve if you have enough knowledge about registry and computer system. We will not suggest you do a manual fix if you are a computer beginner because editing registry and system can cause serious damage which you can never expect. In such case, a registry cleaner will be needed to solve error 0x80072EFD effectively and safely for you.

How to Fix Trustedinstaller.exe High CPU Usage


Many Windows Vista users have ever faced or been facing an issue -  trustedinstaller.exe occupies much CPU resources and stalling Windows.


This article will explain what this process is, what it does, and how to resolve the issue of high CPU usage by this process.


TrustedInstaller is used by a service called “Windows Module Installer” in Vista system. It is used for installing Windows vista system modules which include automatic Windows Update that scans your system for available updates and hotfixes. So when scheduled Windows Update is performing a scan on your system to check for updates, the TrustedInstaller.exe process will appear in task manager and  increases the CPU usage.


Although this process is causing high CPU usage and a slow computer, it is safe and essential for windows system to update itself and run properly.


However, sometimes if you have urgent work to be done, and there is no time to wait for Windows Update to complete, you may want terminate the process and run it another time. In such case, you have two ways to stop the process trustedInstaller.exe:


Method 1 – Turn off Automatic Windows Update

  • Open Control Panel from Start Button
  • Click System and Maintenance.
  • Click Turn automatic update on or off.
  • Select this option: Never check for updates
  • Click OK.

Method 2 – Disable Windows Installer Module from service list

  • Open Control Panel from Start Button
  • Click Administrative Tools.
  • In the right pane of the corresponding window, double-click Services.
  • Locate and double-click Windows Module Installer.
  • Click the General tab.
  • Select Manual from the Startup Type drop down menu.
  • Click Apply.
  • Click OK.


After this, you shall not get trustedinstaller.exe high CPU issue anymore. If you still receive this error, it is suggested that you use a system optimizer to scan your system and fix errors. Virus and malware can corrupt the registry and cause numerous problems in your computer, including the trustedinstaller errors. Remember, 90% of the computer problems are caused by registry issues. So it is always recommended that you install a system optimizer to consistantly protect your system.

How to Fix Generic Host Win32 Error In Simple Steps


Generic host win32 error is an error that occurs in Windows Xp under the situation of updating windows, connecting to internet, playing certain games or plugging in USB devices, etc. The error happens unexpectedly but is believed to be caused by one of the windows regular updates. Here below are the exact error message:


Generic Host Process for Win32 Services Error
Generic Host Process for Win32 Services has encountered a problem and needs to close


To solve this issue, there are simples steps to follow:

  • 1. Click “Start” and then click “Run.”
  • 2. Type “regedit.” This will open the Windows Registry.
  • 3.Navigate to “HKEY_Local_Machine>System>CurrentControlSetup>Services>Browser>Parameters” by following each level in the navigation tree on the left of the window.
  • 4. Right click on the key “IsDomainMaster” in the right side of the window, click “Modify” and set the data entry to “False.”
  • 5. Restart your computer.
  • 6. Navigate to Microsoft Support article 894391.
  • 7. Select the download appropriate for your computer’s operating system. You will now be directed to the specific download site based on your previous selection.
  • 8. Click “Download” and then “Save File.” Double click on the downloaded file to open the installation wizard.
  • 9. Follow the steps of the installation wizard to install the patch.


Above is the solution offered by Microsoft. But some users have found it unable to solve the issue. Generic host process is related to registry which is the base of a running system. Sometimes if the registry is corrupted, the system will not be able to run some programmes or act some functions. To fix registry, there is manual way and automatic way. The manual way is suggested for experts or users who are familiar with editing registry, while the automatic way is suggested for everyone including computer beginners. Now click to learn how to fix Generic host win32 error automatically.

Fixing Windows Update Error 80071AA7


When you are trying to update the system with windows update center, you may suddenly get this error:

Error details: Code 80071AA7

In most cases, this error is temporarily caused by very slight interruptions in communications between the computer to be updated and the update to be downloaded.


Below are several possible causes of error 80071AA7:

Internet is not connected

Antivirus or firewall block windows update center

Windows update components are not well registered

System files are corrupted


To resolve the issue:

First, verify that the internet is connected stably.

Try to access some websites with your browser and see if you can view any websites. If not, your internet connection may be interruppted. Check and ensure that the cable or wireless adapter is correctly set and connected before you move on to next step. If you can’t get the internet connected, contact your internet service provider for help.


Second, disable Antivirus software and try the update again.

Protective software, such as antivirus or firewall, may sometimes block windows update. It worths a try to turn off these third party software first and then try windows update again. You may find the issue resolved by such a simple solution. If the situation is not improved, continue to step 3.


Third, re-register windows update components.

  • Start button,
  • click run button or click search box
  • copy and paste below commands one by one:
  • regsvr32 wuapi.dll
  • regsvr32 wups.dll
  • regsvr32 wuaueng.dll
  • regsvr32 wuaueng1.dll
  • regsvr32 wucltui.dll
  • regsvr32 wuweb.dll
  • regsvr32 MSXML3.dll
  • regsvr32 qmgr.dll
  • regsvr32 qmgrprxy.dll
  • regsvr32 jscript.dll
     

Fourth, run a system files check to fix corrupted system files.

  • open start button
  • run box,
  • type sfc /scannow and press enter.
  • The command will start a scan to check your system files. If an install CD is required, simply put it in the CD rom and let it repair your system.


To fix system files, you can also refer to the help from a windows update fixing tool. It can detect system errors and registry issues in your computer and fix them in a minute. It also has specific function to fix windows update errors by updating windows update components and creating an independent chanel for windows update to avoid conflicts with other programmes.

Solution to Windows Update Error 0x80072EE2


When you use windows update center to download and install updates, you may suddenly get this error:

Error 0x80072EE2: The specified module could not be found

In most cases, this error is caused by temporary issues caused by very slight interruptions in communications between the computer to be updated and the update to be downloaded.

There are several possible causes of error 0x80072ee2:

  • Internet connection fails
  • Antivirus or firewall block
  • Windows update components are not registered
  • System files corrupted


To solve the issue:

First, make sure the internet is connected stably.

Try to access some websites on browser and see if you can sucessfully get into them. If not, your internet connection may have failed. Check and ensure that the cable or wireless adapter is correctly set and connected before you move on to next step. If you can’t get the internet connected, contact your internet service provider for help.


Second, disable protective software temporarily to test the issue.

Protective software, such as antivirus or firewall, are known to block windows update sometimes. It worths a try to turn off these third party software to see whether windows update works again. If the situation is not improved, continue to step 3.


Third, re-register some windows update components.

  • Start button,
  • clicn run button or click search box
  • copy and paste below commands one by one:
  • regsvr32 wuapi.dll
  • regsvr32 wups.dll
  • regsvr32 wuaueng.dll
  • regsvr32 wuaueng1.dll
  • regsvr32 wucltui.dll
  • regsvr32 wuweb.dll
  • regsvr32 MSXML3.dll
  • regsvr32 qmgr.dll
  • regsvr32 qmgrprxy.dll
  • regsvr32 jscript.dll


Fourth, run a system file check to fix corrupted system files.

To do this, open start button, in run box, type sfc /scannow and press enter. The command will start a scan to check your system files. If an install CD is required, simply put it in the CD rom and let it repair your system.


To fix system files, you can also refer to the help from a windows update fixing tool. It can detect system errors and registry issues in your computer and fix them in a minute. It also has specific function to fix windows update errors by updating windows update components and building up a special chanel for windows update to avoid conflicts.


How to Fix Mshtml.dll Error?


Mshtml.dll is a library file related to Internet Explorer. If it is missing or corrupted, the browser will not be able to display websites. There will be an error message indicating that the mshtml.dll is missing or the browser can not load the dll. To solve this issue, there are several methods:


First, install the latest windows update from Microsoft.

Sometimes, the problem may be caused by an imperfect version of windows or internet explorer. In such case, check from the windows update centre. The patch may already be released. To install the lastest windows update:

  1. Click start button, control panel
  2. Click windows update centre
  3. Click “check for latest updates”.


Second, uninstall and resintall Internet Explorer, or upgrade IE to a latest version.

If you already have the latest version of IE, you may need to uninstall and reinstall it to solve the issue. To uninstall and reinstall IE, follow this instruction. If you have IE 6 or IE 7, it is recommended that you upgrade your IE to later version, such as IE 8 or IE 9. To download the latest IE version, please visit Microsoft download centre.


Third, Try a system restore to solve the problem.

Sometimes, dll error can be caused by virus or malware which corrupted the dlls while being removed from the system. In such case, restore the dlls back to system will solve the problem. Normally, to do a system restore is the quickest way to get back the dll. To do a system restore, just go to Start button-all programmes-accessories-system tools-system restore. Choose a restore point previous to the problem, follow the instruction to complete the system restore.


Last, download a registry cleaner to clean the registry errors.

Virus and malware can corrupt the registry and cause numerous problems in your computer, including the dll errors. It is urgent to have a registry cleaner to detect and clean these registry issues for you. Any delay will lead to unimaginable more serious issues. Remember, 90% of the computer problems are caused by registry issues. So it is always recommended that you install a registry cleaner to consistantly protect your system.


Fix Windows Update Error 8000FFFF


Windows Update error 8000FFFF means that there are Windows ‌registry values that are blocking the update from being downloaded and installed. This error usually occurs on Vista or windows 7 system and it not fixable by manually downloading and installing updates.


To trouble shoot this issue:


Method1:  Edit the registry


  1. Open the Registry Editor by clicking the Start button , typing regedit into the Search box, and then pressing ENTER.‌  If you are prompted for an administrator password or confirmation, type the password or provide confirmation.
  2. In the left pane, find and double-click HKEY_LOCAL_MACHINE, and then click COMPONENTS.
  3. Right-click COMPONENTS, and then click Export. By default, this file is saved to your desktop, but you can choose any folder.
  4. In the File Name text box, type COMPONENTS. You have now created a back up copy of the registry values you’re going to be removing.
  5. In the right pane, search for PendingXmlIdentifier, right-click it, and then click DeletePendingXmlIdentifier might not be listed.
  6. In the right pane, search for NextQueueEntryIndex, right-click it, and then click DeleteNextQueueEntryIndex might not be listed.
  7. In the right pane, search for AdvancedInstallersNeedResolving, right-click it, and then click DeleteAdvancedInstallersNeedResolving might not be listed.
  8. Restart your computer and then run Windows Update again.


Method 2:  Rename the Windows Update Software distribution folder


1. Stop the Windows Update service (make sure you are logged on as an Administrator)

Start button || Control Panel ||System and Maintenance ||Administrative Tools
Double-click Services 
(Provide the Administrator password or confirmation if prompted to do so.)
Right-click the Windows Update service and click Stop.

2. Click Start, type %windir% in the Start Search box, and then press ENTER.

Locate and rename the SoftwareDistribution folder.  You can rename it to softwareDistribution.old.


Method 3: Download a registry cleaner to fix the registry problem.


The easiest way to solve the problem is to download a registry cleaner to automatically detect and clean the registry errors. To edit registry by yourself is always risky if you are not familar with regedit system. The safest way to settle the problem is to get a tool to edit the registry for you. And it will be much quicker than editing by hand.