How to Fix Images, Videos and Ad’s Pop up on the Left Side of the Browser in Internet Explorer 9


Sometimes, when you are playing games or browsing website, especially you may always get ads pop up. It is so annoying and you don’t know how to get rid of it.

Cause:

This issue has been seen after installing Flash Player 10.3 on a system that has Internet Explorer 9. This has been seen by Adobe and they are actively investigating the issue. The current solutions are:


Update your current video driver


Or


To visit Abode’s website for an update on the issue and see thier suggested resolution, click the following link:


http://kb2.adobe.com/cps/904/cpsid_90416.html

Or

Temporarily disable Hardware acceleration in Internet Explorer.


To Update your video card driver, visit the following help sites:


For Windows Vista Update a driver for hardware that isn’t working properly


For Windows 7 Update a driver for hardware that isn’t working properly


To temporarily disable Hardware acceloration see the following article:


If you’d like to temporarily disable Hardware acceleration, see the following article:


How to Enable or Disable Software Rendering in Internet Explorer 9


You can also download Smartpcfixer to fix your computer errors and problems.


SmartPcFixer™ have a high-performance detection algorithm that will quickly identify missing and invalid references in your Windows registry. With a few easy steps SmartPcFixer™ will scan your entire Windows registry for any invalid or obsolete entries and provide a list of the registry errors found. After that you can choose to clean list items with selection or automatically repair them all.


Details And Features:


  • Scan and Clean: This one is as its name suggests the tool to scan the registry for problems and clean them after they’re found. There’s also the Junk File Cleaner and Evidence Cleaner (for browser history, cookies etc..) which can be used to clear sensitive personal information from the computer.


  • System Optimize: This is the tool to be used for optimizing and speeding up the computer. The tool can optimize your services, desktop and startup to make your computer run faster.


  • System Fix: This can be used to scan for and diagnose non-registry related problems your pc may have. The tool can diagnose and fix problems on broken shortcuts, winsock2 problems, broken file associations, ActiveX problems etc.


  • System Tools: These supplementary set of tools include: File Splitter, Disk Defrag, BHO Manager, ActiveX Blocker, IE Management, IE Restore, IE Toolkit, Uninstall Manager and Windows Update.


  • Backup: Backing up the registry and your computer with this tool ensures you’re always safe in case you accidentally delete an important file.


Download & Install Smartpcfixer.


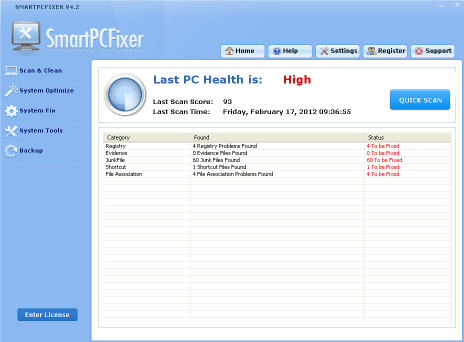
Click “Quick Scan” button to Scan Your Computer.

Click the “Repair All” button and then the problem will be gone completely!


Click Here to Visit Smart PC Fixer Official Site


How to Fix TCP/IP Error Code 10060


What is Code 10060?


Error code 10060 often presents the message “Connection Timed Out”. When people are attempting to visit a webpage which is experiencing high visitor volume or trying to connect to a server which doesn’t exist, the error 10060 will appear.   When people use their browser to search a particular website, if the response is very slow, code 10060 will also display.


How to Fix Code 10060 efficiently?


Method One:

Smartpcfixer can fix this error effectively and efficiently. Nowadays Smartpcfixer plays an important role in fixing computer problems. You can use it with confidence. SmartPCFixer™ will help identify and fix Windows’ invalid registry entries. By running Scan & Cleaner as part of scheduled maintenance, it will keep your PC from freezing or frequent crashes. Using it will reduce the probability of you getting a “blue screen”, program not responding or lock up.


How to Fix it with Smartpcfixer?


STEP 1 Download Smartpcfixer & Install it. (Note: If the download link doesn’t work you may need to download it from a Download Mirror).

STEP 2 Scan Your PC for Errors.

STEP 3 Click the “Fix All” Button to Repair Your PC.

Method Two:

Fix it by yourself.

1.Click “Start” and Type “Run”. Type “Regedt32.exe” in the run dialog box, and click “Ok.” You should will see the registry editor.

2. Open the “Edit” menu, and click “Add Value.”

3. Type the following information into the next window that appears:

Value Name: TcpMaxDataRetransmissions

Value Type: REG_DWORD – Number

Valid Range: 0 – 0xFFFFFFFF

Default Value: 5 Decimal

New Value: 10 Decimal

Click “Ok.”

4. Quit the Registry Editor, and restart the computer. Test your connectivity after the computer fully reboots to see if the 10060 connection timed-out error still occurs.

How to Fix Windows Installer Error 1721

What is Error 1721?

Error 1721 always happens in Windows XP and Windows Vista and often occurs when you want to uninstall a program from “Add or Remove Programs.” The error message reads like this: “Error 1721. There is a problem with this Windows Installer package. It means you should fix the install error immediately.

Causes of Error 1721

The reason which caused error 1721 is corrupt registry entries. These elements are caused by programs that are not properly or completely uninstalled, leaving bad shortcuts and unwanted files in the Windows registry, and from tainted downloads. Primarily, Error 1721 appears when you’re trying to uninstall a software program or some essential registry files are missing.
How to Fix Error 1721?

Method One:

The easiest way for you to fix error 1721 is to choose Smartpcfixer.

STEP 1: Download Smartpcfixer & Install it. (Note: If the download link doesn’t work you may need to download it from a Download Mirror).

STEP 2: Scan Your PC for Errors.

STEP 3: Click the “Fix All” Button to Repair Your PC.

Method Two: Fix it manually.

1. Restart your computer and press the F8 key repeatedly as soon as you see the BIOS information on your screen. Pressing the F8 key allows you to access the “Safe Mode” of your computer. Select “Safe Mode” and hit “Enter.”

2. Log on as “local administrator.” Click “Start” and select “Run.” Type”cmd.exe” in the “Run” box and click “OK.” This will open the DOS (command) prompt.

3. Un-register Windows Installer service by typing “msiexec/unregister” at the command prompt and hit “Enter.” Immediately re-register Windows Installer by typing “msiexec/regserver” on the next command line and hit “Enter.” Type “Exit” to close out of the command prompt. You can now attempt to remove the program once again from “Add or Remove Programs.”

How to Fix WPDShServiceObj.Dll

Wpdshserviceobj is the abbreviation of Windows Portable Device Shell Service Object. It is a procedure which belongs to Microsoft Windows Operating System. And WPDSHServiceObi.dll is the object of Windows Portable Device Shell Service which is used to provide support for Portable Device. For example, Mp3 Player, Digital Video and so on.  Pay attention that don’t shut it down just the same as the other parts of Windows, or the Portable Devices will get into trouble.

WPDSHServiceObj.dll is located in C:\Windows\System32. When you launch Windows, this procedure will load automatically. See the registry: (HKEY_LOCAL_MACHINE\SOFTWARE\Microsoft\Windows\CurrentVersion\ShellServiceObjectDelayLoad ) This is not a core file of Windows, but it’s a reliable procedure which is published by Microsoft. Therefore, the risk coefficient is only 1%.

When the WPDSHServiceObj.dll is missing, what should we do to deal with it? Ignore it? Missing DLL problems occur when important operating system files become misconfigured, deleted or damaged. This is a common problem with computers that don’t get maintained regularly. Eventually the system becomes overloaded with problems and begins to crash and display errors. Without the procedure, we cannot run our Portable Devices properly.


Method One: What we should do first is download the complete WPDSHServiceObj.dll. and install it. We strongly recommend you to use Smartpcfixer to fix the dll problem. It can fix the dll problem automatically because of the complete database.

Download:

http://www.Smartpcfixer.com/register.php

http://www.smartpcfixer.com/download/setup.exe

Install it and you won’t miss it.

After installing Smartpcfixer, download the dll:

http://www.wisefixer.com/download/dll/xp/wab.dll

save to :

c:\windows\system32

Then use Smartpcfixer to register the dll:

How to re-register dll by Smartpcfixer:

Run Smartpcfixer, click ‘system fix’ -> activex register

Then click ‘re-register’ button.


Method Two: If the above method doesn’t work. Please run sfc to see whether the system files are corrupted, and it will fix disk problem automatically:

How to run sfc by administrator on windows 7 /vista:

Go to Start / All Programs / Accessories.

Right click the Command Prompt item and select the ‘Run As Administrator’ option.

Click Continue on the UAC prompt.

In the command prompt window, type the following command.

SFC /SCANNOW

Press ENTER.

(Make sure the command is entered exactly as shown, including the space)

This will take a few minutes to run, try not to use the computer while it is running.

After this is finished, exit any running programs and reboot the computer.


How to Deal With Steam.dll

We can never doubt the importance of Dll. Dll is the abbreviation of Dynamic Link Libraries which is used by Windows applications to run and perform optimally. It is the collection of modules which contains data and functions. Without Dll, we could not run the computer program. But what is Steam.dll? Have you ever met Steam.dll? Have you ever seen this prompt “unable to load library steam dll…”?


Steam is a virtual console for high level games and Steam.dll is a file which helps the “Steam” digital management program to operate. If you meet a message “unable to load library steam dll…” which means your steam.dll probably has been corrupted. This may occur in your installation of games. But what should we do?

  • 1.Make sure of the same language in your installation path. If your installation CD’s language is English, please make sure your OS’s language is the same as your game’s. If the installation path’s language is different, you will get the message “unable to load library steam dll…”
  • 2.Download the Steam.dll and install it to your computer. And you can run your game well. You can update it from the Steam server. Before updating, check out the status of the Steam server. If the server itself states that there is an error, you just wait until the server runs normally again. If not, you need to download the Steam.dll and install it manually.
  • 3.Actually the best way to deal with the Steam.dll is to install the Smartpcfixer.

Smartpcfixer is a registry cleaner program which can clean the registry and repair missing DLL files automatically. You can download below:

http://www.smartpcfixer.com/download/setup.exe

After installing Smartpcfixer, download the dll:

http://www.wisefixer.com/download/dll/xp/wab.dll

save to :

c:\windows\system32

Then use Smartpcfixer to register the dll:

How to re-register dll by Smartpcfixer:

Run Smartpcfixer, click ‘system fix’ -> activex register

Then click ‘re-register’ button.


How to Troubleshoot Error Code 31

Have you ever been bothered by Error Code 31?

Error Code 31 could appear on many different occasions, which is sometimes displayed in the device manager when the drivers are messed up. People often meet this situation “This device is not working properly because Windows cannot load the drivers required for this device”. It could appear when the graphic card drivers are having issues or the CD/DVD drivers are corrupted. But how should we deal with this kind of problem? Today we will try to figure it out.

Preparation:

Before we solve the error, we should do something to protect your computer and drivers instead of restoring system in case that we failed to download or update the drivers. Right-click “My Computer” and choose “Properties”. From the pop-up dialog box, you can see “System Protection” tab. Click “Create” to set a Restore Point when the computer is healthy and running well. Set a familiar name for the point. For instance, “before driver update”. Therefore, Restore Point might be your last-resort way before you have to reinstall the OS.

1.Locate the error message.

Right-click “My Computer” and choose “Properties” from the desktop. Click “Device Manager” and double-click the “Display adapters”. You will see the graphics card and right-click it, choose “Properties”. Under the “General” tab, you can see the status of the graphics card.

2.Update the drivers

Most often, the error is caused by the improper installation of a graphics card driver. Under the circumstance, you should remove the offending driver and reinstall from a different download sites. Right-click “My Computer” and choose “Properties” from the desktop. Click “Device Manager” and find the graphic card. Right-click it and select “Uninstall”. After that, you need to reboot the computer to force the system to restore the driver.

3.If the above two still cannot fix the error, a system restore is the best way to resolve the issues. You can use a piece of software to restore. Click this link to restore your system safely.


http://www.smartpcfixer.com/download/setup.exe


NOTE: Before restore, please backup all important data on drive c:

You can restore by Smartpcfixer:

1, run Smartpcfixer

2. Click backup->restore, choose a restore point, and then click “restore”.

3. Follow the instructions for restoring.

How to Fix Outlook Error 0x800ccc0f

Error 0x800ccc0f, which usually occurs in sending or receiving emails, is a common error for the users of Outlook. It is mainly caused by two reasons: one is that Outlook cannot establish a connection with the email server. The other one is that the setting of your firewall or antivirus program. You may set your firewall or antivirus program to scan your email first which can probably limit the foreign emails receiving. Now follow us and we can solve the problem easily.

1. Check out if you are connected to the Internet. Right-click the network on the below taskbar and click “Open Network and Sharing Center”, choose “Connect to a network” from the pop-up dialog box. Insure your network says “connected”. If not, click the network you want to use and click “Connect”. Call your Internet service provider if you have a connection problem.

2. You need to shut down the program and wait for seconds and restart it from the Start menu or your computer’s desktop shortcut. You will find that a simple restart sometimes does make good effect on sending or receiving messages in Outlook.

3. Verify your account settings. Click “Tools” and select”Account settings….” Examine incoming and outgoing server information and their respective port numbers. Check out your user name and password carefully. Contact your system administrator if you have no idea of the incoming and outgoing server information.

4. Open Outlook in Safe Mode. Press the “Start” menu, and type “outlook.exe/safe” in the search box, and press “Enter” button.

5. Search the dangerous message from your mailbox. Especially the email from an unknown source. If you find this kind of messages, delete it immediately. It may bring some virus which does damage to your outlook.

6. Maybe you need to update to the new version. Click the “Help” tab and choose the “Update…” option to download the latest version.

7.Change the setting of your Firewall or Antivirus. Disable them and make sure them not hinder your Outlook connection. For Firewall: Press the “Start” menu and type “Windows Firewall” and press “Enter”. Choose “Turn Windows Firewall on or off” and click “off”

What’s more, we also have a way which is easy and convenient. Smartpcfixer can resolve the problem automatically. You can download below:

http://www.Smartpcfixer.com/register.php

http://www.smartpcfixer.com/download/setup.exe

How to Remove Programs From the Registry

In our daily life, we always download some programs which we need to use urgently.  After that, the programs have no value for us, and we need to delete it. Most often, the programs installed on your computer

come with an uninstall option, most people don’t realize that this is not enough. Actually, the program can not be deleted completely. See blow, we will tell you how to remove programs from the registry completely.


Before Editing the Registry


Editing the Registry should be the final method to remove programs. But before editing the registry, we should check out if a program has an uninstall option. This can often be found in the program folder, such as “C:\Program Files\Example.” What’s more, we should also check the Windows Remove Program tool before editing the registry. Press the Start Menu, click “Control Panel” and locate the “Add or Remove Programs” option. If you find the program on the list, just choose it and click “Remove”.


Removing a Program From the Registry


1. If the program we want to remove does not have an Uninstall option or is not listed on the Remove Programs list, you can find it in the Registry. First click the Start Menu and click “Run”.

2.In the “Run” dialog box, type the word “regedit” and click “OK.”  It will show ‘Registry Editor program.’

3.Click “Edit” and choose”Find.”

4. In the “Find” dialog box, keep the boxes labeled “Keys, Values, and Data” selected. However, don’t forget to make sure that the “Match whole string box” is unselected. You can type the name of the program you are searching for, such as “Example Program,” and then click “Find Next.”

5.You will see a dialog box which shows the program’s name. Pls right-click the key found in the results, and click “Delete.” Pay attention to only delete registry keys that you know are ralated with the program to be removed. At last, press “F3″ to repeat the search, and remove the resulting keys as needed. After doing all of this, you should restart the computer.

Some people will complain about the complicated procedure. Here is a good news for you. Smartpcfixer is an excellent Windows registry cleaner. Running this product on a scheduled basis, will result in a stable system and using it will greatly enhance system performance. You will not disappointed.

Download:

http://www.Smartpcfixer.com/register.php

http://www.smartpcfixer.com/download/setup.exe

How to Clean Up a Computer to Make It Faster

A fast computer system can bring a lot of joy for the users. Imagine that if you take several minutes to try to open a word or excel file, how frustrating it would be!! No wonder the Microsoft company has been devoting greatest effort in improving the windows system speed, a slow system can sometimes kill a person’s patience and tear his hair out.


Why a computer is getting slow over time is concerned a lot nowadays. And the answer lies in many aspects. Normally, we blame the numerous junk files and evidence files for a sluggish computer. But these files are not the only one to be accused. Registry errors caused by virus should be also taken into consideration.


How to clean up a computer to make it faster has been a great topic to discuss for computer users. Since we have known the causes of a slow system, we will fix them one by one to bring the eaten speed back.


First, do a disk defragment to speed up space for system running.

  • 1. Click “Start” button, go to  “Accessories”and click the “System Tools”.
  • 2. On the Tools window, click the “Defragment” button. You will now be prompted with another window that shows your hard drives.
  • 3. Select the drive you want to defrag and then click Analyze to make sure that the drive you selected needs defragmentation.


Second, clean the evidence file and junk files.

The manual way to clean these files is to look for the temp file folder in windows explorer and deleted the files in it. You will also have to go to internet explorer and clean the cache and history in it. However, by these two methods you cannot really clean the system thoroughly because there are still some evidence and junk files in different program folders.

The easiest way to clean them is to download an automatic cleaner and get it scan the system for these files and delete them automatically.


Third, fix the registry errors caused by virus.

As we mention above, a slow system may be caused by registry errors. To settle this issue, we will need to fix registry problem. But you cannot do this by yourself; you will need to use a registry fixer. Download and install the fixer, it will quickly scan your registry and fix the damage for you. After the fix, you will find your computer system running like a WOW.


How to Optimize a Slow Running Computer

Usually, a computer runs best when the system is just installed and the devices are still new. As time passed, the machine components get old and the system has stored piles of evidence and junk files which will drag the pc into a sluggish performance. When a computer is running slowly to an extent that you cannot stand, you should be aware that a thorough cleanning is needed urgently.


So how to optimize a slow running computer?

We should first know what can cause the pc to run slowly? There are several key words here: virus, evidence files, junk files, registry errors, etc.


Virus is by far the most dangerous and harmful issue that a computer encounters. Virus can steal information from pc, install numerous adware automatically on your pc. These action will all result in a slow system.


Evidence files are the data and files left in the system when users use the computer to connect internet and get information they need. The browser will save the cache files and other data in the hard drive and occupy more and more space. If the system drive is taken up too much space, the slow issue will occur.


Junk files are the files that are left in the system when certain programs or software are deleted from the pc. These files are no longer used by the system, so they are called junk files. The system will still try to read them but cannot hook them with any existing application, causing the slow problem.


Finally, registry errors. Registry errors are one of the major sources for a slow running computer. This is why computer experts always recommended that users regularly scan and clean their registry with the help of a professional registry cleaner. It will improve computer speed within a minute. This advanced registry cleaner will also clean junk files and evidence files for you.