How to Fix Proxy.dll

Dll is the abbreviation of Dynamic Link Libraries which is used by Windows applications to run and perform optimally. It is the collection of modules which contains data and functions. Dll files are essential system components that will cause errors if they are not complete. It may be resulted from corruption of the files or deletion. Sometimes, they also run into errors when the hard disk is improperly cleaned by using disk programs. As a result, the program cannot run properly because of lacking Dll files.

Proxy.dll plays an important role in computer. If you encounter the situation “Cannot find the missing Proxy.dll”,then Proxy.dll may be missing or your computer may have registry error. You should take this error seriously. Such errors can heavily influence the performance of your PC. Once getting the messages “Proxy.dll Not Found” and “Proxy.dll is Missing”, please fix Proxy.dll related errors immediately.

To fix Proxy.dll, you should download the Dll first and check your Windows Registry for Proxy.dll errors.

Proxy.dll can be caused by the malicious virus or Trojan. The first thing when you encounter this error, please run your Antivirus software to do a complete scan for your computer.

If this error still persists, please do the following steps.

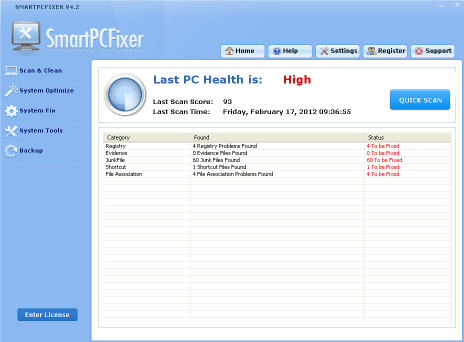
Download a Smartpcfixer to help you solve the problem. Smartpcfixer is a registry cleaner program which can clean the registry and repair missing DLL files automatically. You can download below:

http://www.smartpcfixer.com/download/setup.exe

After installing Smartpcfixer, download the dll:

Save to :

c:\windows\system32

Then use Smartpcfixer to register the dll:

How to re-register dll by Smartpcfixer:

Run Smartpcfixer, click ‘system fix’ -> activex register

Then click ‘re-register’ button.


How to Repair JIT Debugger Error


JIT debugger error is a common windows error come across by computer users. Just-In-Time debugging launches Visual Studio automatically. When an exception or crash occurs in an application running outside Visual Studio, the problem occurs. When you get an error about JIT debugging, you need to check if there is a problem with Visual Studio.


You can restore Visual Studio issues either manually or automatically using the JIT debugger. If this utility malfunctions, you can fix it using a simple manual procedureWith the JIT debugger utility, you can troubleshoot errors and problems that prevent Visual Studio from performing correctly. It is likely that an issue such as a missing or corrupt file is keeping JIT debugger from functioning.


Please follow below steps to fix JIT debugger problem:


One:

  1. In the Start menu, click Run.
  2. In the Run dialog box, type regedit, then click OK.
  3. In the Registry Editor window, locate and delete the follow registry keys:
  4. HKEY_LOCAL_MACHINE\SOFTWARE\Microsoft\Windows NT\CurrentVersion\AeDebug\Debugger
  5. If your computer is running a 64-bit operating system, delete the following registry keys also:
  6. HKEY_LOCAL_MACHINE\SOFTWARE\Wow6432Node\Microsoft\Windows NT\CurrentVersion\AeDebug\Debugger
  7. Take care not to accidentally delete or change any other registry keys.
  8. Close the Registy Editor window.


 Two:

When you cannot fix the problem by above instrucions, or you don’t know how to follow the steps above, you can use a registry cleaning software. SmartPCFixer is the best choice.


  • Please download and install SmartPCFixer by clicking it.
  • After installation, start SmartPCFixer and on the interface click Scan button.
  • After Scan, click Repair All button.


How to Get Back Missing Desktop Toolbar


Sometimes, the desktop toolbar will disappear from the task bar if the system registry is corrupted or changed. If you have recently switched to another system, or installed any updates, you may probably have done some damage to the system.  For people who use laptop, the tool bar is important when they are not connected with power supply.


The battery will run out gradually and the power button can  tell how much time is left so one can backup the work and things or plug in power line to continue. Sometimes, the desktop toolbar will disappear from the task bar if the system registry is corrupted or changed. If you have recently switched to another system, or installed any updates, you may probably have done some damage to the system.


To solve this issue, please follow below steps:

First, download a registry fixer to fix it automatically.

SmartPCFixer is a registry cleaner to clean your windows and fix the problem automatically.  If you are not familiar with registry edit, we would recommend you use this automatic tool to fix your problem.


Second, please conduct a system restore:


  • 1. Log on to Windows as an administrator.
  • 2. Click Start, point to All Programs, point to Accessories, point to System Tools, and then click System Restore.
  • 3. On the Welcome to System Restore page, click to select the Restore my computer to an earlier time option, and then click Next.
  • 4. On the Select a Restore Point page, click the most recent system restore point in the On this list, click a restore point list, and then click Next.
  • 5. On the Confirm Restore Point Selection page, click Next. System Restore restores the previous Windows XP configuration, and then restarts the computer.
  • 6. Log on to the computer as an Administrator. Then click OK on the System Restore Restoration Completepage.


Three, edit your registry by below instructions:


  • 1. Click Start. In the Start Search field, type regedit.exe and then press Enter.
  • 2. Locate and then click the following registry subkey:
  • HKEY_CURRENT_USER\Software\Classes\Local Settings\Software\Microsoft\Windows\CurrentVersion\TrayNotify
  • 3. In the Details pane, click the IconStreams registry entry.
  • 4. On the Edit menu, click Delete, and then click Yes.
  • 5. In the Details pane, click the PastIconsStream registry entry.
  • 6. On the Edit menu, click Delete, and then click Yes.
  • 7. Exit Registry Editor.
  • 8. Restart the Explorer.exe process. To do these, follow these steps:
    • a. Press CTRL+SHIFT+ESC.
    • b. On the Processes tab in Task Manager, click the explorer.exe process, and then clickEnd Process two times.
    • c. On the File menu, click New Tasks (Run), type explorer, and then click OK.
    • d. Exit Task Manager.


How to Fix Runtime Error 217

Have you still been troubled by Runtime Error 217 on your PC? Have you ever figured out a solution to fix this annoying problem? Don’t panic. If you read the following article carefully, you can easily solve the problem by yourself.

Several Reasons caused Runtime Error 217:
1. Incorrect DLL Registry Information
People may receive this error due to incorrectly registered Dll files. In order to fix it, please follow below instructions to fix it manually:
Download the dll you need.
Save to:
c:\windows\system32

Then use Smartpcfixer to register the dll:
How to re-register dll by Smartpcfixer:
Run Smartpcfixer, click ‘system fix’ -> activex register
Then click ‘re-register’ button.
2. Outdate Msvcrt.Dll file
You can solve this problem by updating your OS. Or you can copy this file from another computer and save it to c:\windows\system32. What’s more, you can download from the Internet yourself.
3. Incorrect Regional Settings.
Runtime Error 217 can also be caused by that the date is not right for the location you are searching online.
You should change the date by the following steps:
a. Click the time on the left of your taskbar.
b. Click “Change date and time settings”
c. Under date and time, select appropriate date and under time zone, select your location.
d. Press OK.
4. Infected with Viruses.
Sometimes viruses may invade into the registry easily. Therefore, remember to scan your system for viruses periodically with your antivirus software.
5. Outdated Device Driver.
You should update the driver in time. LionSea DriverTuner™ – advanced driver-updating software which
can fix driver problems and keep PC drivers updated with the latest official drivers. You can download it below:

http://tinyurl.com/ctsuro7

All in all, there are many methods to fix this error, the best way to fix it is to use Smartpcfixer, which can fix all the above problems. Just give it a shot.

How to Fix Code 24


This device is not present, is not working properly, or does not have all its drivers installed. (Code 24)

Cause:

The device is installed incorrectly. The problem could be a hardware failure, or a new driver might be needed.

Devices stay in this state if they have been prepared for removal. After you remove the device, this error disappears.

Resolution:


Remove the device, and this error should be resolved.


This is simple, right? But this may not fix your problem. If so, you can download Smartpfixer to fix your problem for you.


Smartpcfixer is the program that can be immediately downloaded and works through giving a quick scan on the entire drive while automatically repairing the problems in it. After the repair, users will not only notice an instant change in speed of the system but at the same time, there will also be lesser cases of freezing, reduced system errors as well as a renewed general computing and speed power.


Smartpcfixer is one of the top ranking registry cleaners especially dedicated for fixing computer errors and optimizing system settings.


Key features:


  • Scan and Clean: This one is as its name suggests the tool to scan the registry for problems and clean them after they’re found. There’s also the Junk File Cleaner and Evidence Cleaner (for browser history, cookies etc..) which can be used to clear sensitive personal information from the computer.


  • System Optimize: This is the tool to be used for optimizing and speeding up the computer. The tool can optimize your services, desktop and startup to make your computer run faster.


  • System Fix: This can be used to scan for and diagnose non-registry related problems your pc may have. The tool can diagnose and fix problems on broken shortcuts, winsock2 problems, broken file associations, ActiveX problems etc.


  • System Tools: These supplementary set of tools include: File Splitter, Disk Defrag, BHO Manager, ActiveX Blocker, IE Management, IE Restore, IE Toolkit, Uninstall Manager and Windows Update.


  • Backup: Backing up the registry and your computer with this tool ensures you’re always safe in case you accidentally delete an important file.


Download & Install Smartpcfixer.


Click “Quick Scan” button to Scan Your Computer.

Click the “Repair All” button and then the problem will be gone completely!


- Try it now for FREE!
You won’t be disappointed.


How to Fix Code 21

Symtom: Windows is removing this device. (Code 21)

Resolution:

This error means that Windows is in the process of removing the device. However, the device has not yet been completely removed. Here are some things that you can try to resolve this problem.

  • Wait several seconds, and then press the F5 key to update the Device Manager view.

If that does not resolve the problem, restart your computer. Click Start, click Shut Down, and then select Restart in the Shut Down Windows dialog box to restart the computer.

Recommended resolution:


Smartpcfixer is one of the top ranking registry cleaners especially dedicated for fixing computer errors and optimizing system settings.


SmartPcFixer™ have a high-performance detection algorithm that will quickly identify missing and invalid references in your Windows registry. With a few easy steps SmartPcFixer™ will scan your entire Windows registry for any invalid or obsolete entries and provide a list of the registry errors found. After that you can choose to clean list items with selection or automatically repair them all.


Scan & Clean IE Tools Registry Backup System Optimize


A Toolkit designed to scan, diagnose and your operating system. Using it results in better optimization, manages startup and desktop, assists you with maintaining browser objects, internet options, system service, and repairs file extensions. With this arsenal of powerful, sophisticated utilities your system is tuned to run at its optimal state. Included are Easy Repair Wizard, Error Utilities, File Association fixer, Register ActiveX, Shortcuts Fixer, Winsock2 Repair toolkit, Dll Fixer.


SmartPCFixer™ is a top-ranking error-resolution registry cleaner which will fix the computer errors and optimize the system settings. You can scan, clean, optimize, and keep your PC much healthier with it!

To fix the problem, do one of the followings:

  • Double-click the  SmartPCFixer  icon on your desktop.
  • Select Start All Programs | SmartPCFixer | SmartPCFixer

How to Repair Windows 0×80070490 Error


Windows update errors are very common windows problems. When you update a program, you may receive an error message about windows update. Error 0×80070490 is an error message that will appear on your PC when your windows updates failed. This error is  caused by that the system is missing some important components for Windows update.


To fix the 0×80070490 problem, you need to repair your windows. Please follow below steps according to your windows OS:


If your PC is Windows XP:


Use the System File Checker to verify that the correct versions of the system files are present. To do this, follow these steps:

    • 1. Click Start, and then click Run.
    • 2. Copy and then paste (or type) the following command in the Open box, and then press ENTER:
      cmd
    • 3. At the command prompt, type sfc /scannow, and then press ENTER. Note If you are prompted for your Windows XP CD, insert the CD into the CD drive.
    • 4. After the System File Checker has finished, try to install updates again.

If your PC is Windows 7, Windows Vista and Windows 8:
Performe a repair installation to restore the current Windows installation to the version of the installation DVD.


  • 1. Close all the running applications .
  • 2. Insert the Windows Vista, Windows Server 2008, Windows 7 or Windows Server 2008 R2 DVD in the computer’s DVD drive.
  • 3. In the Setup window, click Install Now.
  • 4. Click Go online to obtain the latest updates for installation (recommended).
  • 5. Type the CD key if you are prompted to do this.
  • 6. Select the operating system in “Install Windows” page you want to Upgrade or Inplace.
  • 7. Click Yes to accept the Microsoft Software License Terms.
  • 8. On the Which type of installation do you want? screen, click Upgrade.


If you find above instructions are too complicated, you can turn to aRegistry Cleaner for help. Registry Cleaner can also clean your system and optimize the performance. I suggest you use this tool, it also has a windows update function, which will automatically detect and install the windows update for you.


How to Get Rid of CPU Usage High Problem

High CPU usage means that the programs installed on your computer are using full energy of the CPU, and your computer thus runs very slowly. Open up task Manager by pressing Crtl-Alt-Delete at the same time, and then click Performance tab, your CPU usage history will be displayed.

There are many legitimate programs or illegitimate programs such as spyware and viruses on your computer that are the cause for high CPU usage. If the CPU spikes happen rarely and can correct themselves quickly, don’t worry about it. But if they keep coming back or don’t go away, you have to fix it.


How to fix CPU Usage High problem?

  • Scan for Spyware or Adware

Since spyware or adware is often the cause for high CPU usage, you should first scan your PC for these nasties.


  • Disable the amount of services running in the background

You can do this by altering your computer configuration. Here is how:

  • 1. Open your Start menu.
  • 2. Click Run
  • 3. In the command screen type “msconfig.exe”
  • 4. In the “system configuration utility”,click either “service” or “startup” tab
  • 5. Uncheck all programs that your are no longer using.
  • 6. Click “OK”


  • Cleaning your Registry

You can free a lot of resources by cleaning your registry.  Use a cleaner to repair it. This is a must!


  • Stop Svchost.exe

Svchost, which is short for “service host“, is a core part of the operating system that provides support to many of the required services that are Windows. You can see all the copies of svchost and what services they are running by typing “tasklist / svc” in a command window. It’s necessary for your computer to function properly. However, you can stop the amount processes that are loaded. This will limit the need to for svchost server for loading. Here is one way to stop the svchost from loading.


You can also use Registry Cleaner to fix the problem. SmartPCFixer is good at fixing computer errors and problems.

  • 1. Download SmartPCFixer and install it to your computer.
  • 2. Do a scanning of your computer.
  • 3. Fix the problem by clicking “Repair All” button.


How to Fix Windows Installer Error 1601


No matter your windows is Windows7, Windows Vista or Windows XP, you always get windows error code. Different code stands for different problem.  To fix the windows error, you need to understand the code and know the reasons that caused the problem.


Error code 1601 is a common windows error encountered by many computer users. You may have encountered an error called “Windows Error Message 1601 When installing applications via the Microsoft Windows Operating System.” According to Microsoft, this error occurs for one of two reasons. The error code 1601 can be cuased by a few reasons.


  • The first reason is that you try to install windows in safe mode.
  • The second possibility is that the Windows Installer is not properly installed. Reinstall it may fix the problem.


No matter what is the reason that caused the problem, following steps will always help you fix the problem:


Method 1:  To check whether the Windows Installer service is set to a value of Disable

  1. Click Start, type services.msc in the start search box and press enter.
  2. In the Services (Local) list, right-click Windows Installer, and then click Properties.
  3. If the Startup type drop-down list is set to a value of Disable, select the Manual option from the Startup type drop-down list.
  4. Click on Start button below the heading service status and click OK.


Method 2: Re-register the windows installer

  1. Click Start, open the run box (windows key +R)
  2. Type msiexec.exe /unreg and click ok.
  3. If you receive a confirmation message, click OK again.
  4. Click Start, open the run box (windows key +R)
  5. Type msiexec /regserver and click ok.
  6. If you receive a confirmation message, click OK again.
  7. Try to install the application and see if the issue persists.
  8. If you still get the error then try next method.


Method 3: Clean your windows with Registry Cleaner.
  • Download Registry Cleaner to your computer.
  • Install it and do a scanning of your windows.
  • Fix the error by one click.


How to Fix Windows Installer Error 1706


Error 1706 often appears in the form of “Error 1706. Setup cannot find the required files”

When you receive this error, it indicates that there must be something wrong with your installation when you attempt to install or repair Microsoft Office Software. It shows that the setup cannot locate the required files for installation.

In order to fix windows installer error 1706, you really need to find the most effective way.

Smartpcfixer is designed to troubleshoot windows installer error including error 1706, 1603.

If you choose Smartpcfixer, there is no need to worry the problem of window installer update.

This software will help you check and fix windows errors automatically.

Smartpcfixer is a set of tools which is designed to provide the user’s computer system with better optimization, which helps you manage startup items, desktop, browser objects, Internet, system service, Windows optimization, file extensions and so on. With these sophisticated utilities your system is tuned up to run at the optimal state.

How to Fix Windows Installer Error 1706 with SmartpcFixer?


STEP 1 Download Smartpcfixer & Install it. (Note: If the download link doesn’t work you may need to download it from a Download Mirror).

STEP 2 Scan Your PC for Errors.

STEP 3 Click the “Fix All” Button to Repair Your PC.

We can also provide you another method which you can fix it manually.

1.Place the Microsoft Office disc in your CD-ROM drive.

2.Click the Windows logo in the bottom left corner of the desktop. Press the Windows button on your keyboard plus “R” to open the Run utility.

3.Type the following command in the dialog box:

CD-ROM drive:\Setup /a

“CD-ROM” represents the drive letter of your CD-ROM drive. For example, if your CD-ROM letter drive is “K,” type “K drive:\Setup /a.” Click “OK.”

4.Give the hard drive location for the Office administrative installation in the “Administrative Installation” box.

5.Enter the Product Key and click “Next.” Wait for the installation to complete and click “OK.”

6.Complete the on-screen prompts in the “Use an Alternative Network Administrative Installation” section. This alters the Office source location to the administrative installation on your drive.